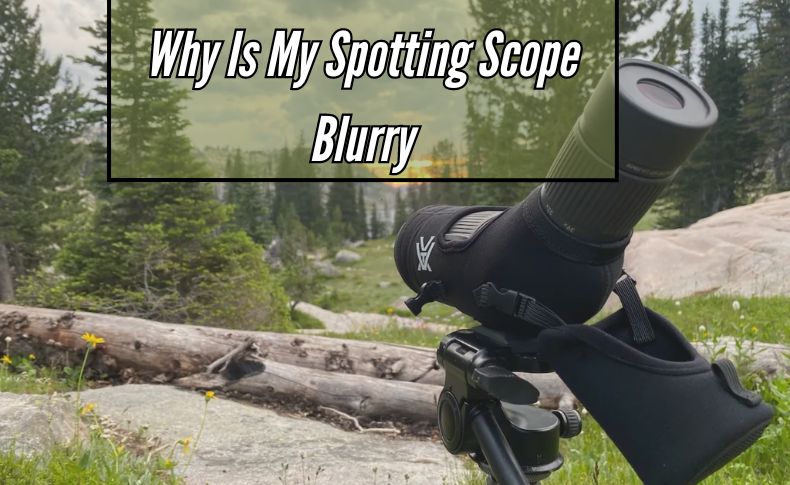
Are you dissatisfied and finding it difficult to focus on your target because of blurriness in your spotting scope? This frequent problem may be caused by a number of things, including poor illumination, dirty lenses, or incorrect alignment. Gaining clear, sharp photos throughout your outdoor experiences requires knowing why your spotting scope is fuzzy.
Why Is My Spotting Scope Blurry? There are a number of reasons why your spotting scope may be fuzzy, including poor focus, dirty lenses, and environmental factors like humidity or heat waves. The first step in fixing it is to use a soft cloth to clean the lenses and make sure the focus is proper. Adjust the focus knob and give it another go. If the problem continues, take the surrounding conditions into account and modify as needed to improve viewing clarity.
We’ll look at some of the possible causes of this issue in this tutorial, along with some easy fixes to get you troubleshooting and solving it successfully. Gaining proficiency in identifying scope clarity will improve your wildlife viewing experiences, regardless of skill level. Let’s examine the causes of the fuzziness and discover how to sharpen the image.
Unlocking Clarity: Troubleshooting Your Blurry Spotting Scope
Spotting scopes are essential tools for birdwatchers, hunters, and outdoor enthusiasts alike, providing a closer look at distant objects. However, encountering blurry images through your spotting scope can be frustrating. Fear not, as we delve into some troubleshooting steps to regain that crystal-clear view.
Understanding Optics: The Fundamentals
Before diving into solutions, it’s crucial to grasp the basics of optics. A spotting scope consists of lenses and prisms that work together to magnify distant objects. Understanding how these components function will aid in pinpointing the root cause of blurriness.
Cleaning: The First Step to Clarity
Often overlooked yet fundamental, cleaning your spotting scope can work wonders. Dust, fingerprints, and smudges on lenses can significantly impact image quality. Utilize a soft brush or lens cloth to gently remove debris, followed by a lens cleaner for stubborn stains.
Focus: The Key to Sharpness
Achieving proper focus is paramount for clear images. Begin by adjusting the focus knob until the image appears sharp. If the image remains blurry, slightly rotate the focus knob in both directions to pinpoint the clearest point. Patience is key here.
Check for Collimation Issues
Collimation refers to the alignment of the optical components within the spotting scope. Misalignment can lead to blurry images.
To check for collimation issues, observe a distant object through your scope. If the image appears distorted or misaligned, collimation adjustment may be necessary.
Evaluate Eyepiece and Objective Lens Quality
The quality of your spotting scope’s eyepiece and objective lens can significantly impact image clarity. Investing in high-quality lenses can enhance image sharpness and contrast. Evaluate your equipment and consider upgrading if necessary.
Seek Professional Assistance
If despite troubleshooting, the issue persists, it may be time to seek professional assistance. Optics specialists can diagnose and repair more complex issues with precision, ensuring your spotting scope performs optimally.
Crystal Clear Vision: Strategies to Combat Blurriness in Your Spotting Scope

Having a clear view through your spotting scope can make all the difference in your outdoor experiences, whether you’re birdwatching, hunting, or simply enjoying nature. Here are some practical strategies to combat blurriness and enhance your spotting scope’s performance.
Understanding Optical Basics:
Before diving into solutions, it’s essential to grasp the fundamentals of optics. Your spotting scope consists of lenses and prisms that work together to magnify distant objects. Blurriness can stem from various factors, including misalignment, dirt, or poor quality optics.
Cleaning and Maintenance:
Regular maintenance is key to preserving the clarity of your spotting scope. Dust, fingerprints, and debris can accumulate on the lenses, leading to blurred images.
Use a soft brush or compressed air to remove loose particles, followed by a gentle wipe with a microfiber cloth and lens cleaning solution for stubborn stains.
Calibration and Alignment:
Optical devices like spotting scopes may require periodic calibration to ensure optimal performance. Check the alignment of your scope’s lenses and prisms, making adjustments if necessary. Properly aligned optics can significantly reduce blurriness and improve image quality.
Optimizing Lighting Conditions:
Lighting plays a crucial role in spotting scope visibility. Avoid using your scope in harsh sunlight or low-light conditions, as these can cause glare or shadows, leading to blurred images. Opt for early morning or late afternoon sessions when natural light is softer and more diffused.
Choosing the Right Eyepiece:
The eyepiece of your spotting scope can greatly influence the clarity of your viewing experience. Invest in a high-quality eyepiece that matches your scope’s specifications and your intended use.
Look for features like adjustable eyecups and multi-coated lenses to minimize distortion and enhance image sharpness.
Utilizing Stability Aids:
Shaky hands or unstable mounting can contribute to blurry images, especially at higher magnifications. Use a sturdy tripod or monopod to stabilize your spotting scope, minimizing vibrations and ensuring steady viewing.
Additionally, consider using a remote shutter release or timer to reduce camera shake when photographing through your scope.
Regular Practice and Adjustment:
Achieving crystal-clear vision with your spotting scope may require patience and practice. Experiment with different settings, techniques, and environmental conditions to find what works best for you. Keep an open mind and be willing to make adjustments along the way to optimize your viewing experience.
Defeating the Blur: Proven Techniques for Sharp Spotting Scope Images
Understanding the Basics:
Before we delve into techniques, it’s essential to understand the fundamentals of capturing sharp images through spotting scopes. This includes familiarizing oneself with concepts such as image stabilization, focal length, and camera settings tailored for spotting telescope photography.
Exploring Stability Solutions:
Stability is paramount when it comes to defeating blur in spotting scope images. Investigate various methods for stabilizing your setup, such as using a sturdy tripod, a gimbal head, or even a bean bag support. These tools help minimize vibrations and ensure steady shots, crucial for achieving sharpness.
Mastering Focus Techniques:
Achieving sharp images heavily relies on mastering focus techniques. Experiment with both autofocus and manual focus modes to determine which best suits your shooting conditions.
Additionally, learn to utilize techniques like focus stacking to maximize depth of field and overall image sharpness.
Optimizing Camera Settings:
Properly configuring your camera settings is instrumental in capturing sharp spotting scope images. Adjust settings such as shutter speed, aperture, and ISO sensitivity to accommodate different lighting conditions and subjects. Finding the right balance between these parameters is key to minimizing motion blur and maximizing image clarity.
Utilizing Post-Processing Tools:
Post-processing software can further enhance the sharpness and overall quality of your spotting scope images.
Explore tools like Adobe Lightroom or Photoshop to fine-tune sharpness, contrast, and clarity. However, exercise restraint to avoid over-processing, which can degrade image quality.
Experimenting with Different Lenses:
Experimenting with different lenses can yield varying results in terms of image sharpness and overall quality. Consider using prime lenses known for their sharpness, or explore telephoto lenses to achieve greater magnification while maintaining image clarity.
Understanding the characteristics of each lens type is crucial in selecting the most suitable option for your needs.
Continuous Learning and Practice:
Sharp spotting scope images are often the result of continuous learning and practice. Take the time to hone your skills through regular shooting sessions and experimentation with different techniques.
Embrace challenges and learn from mistakes to continually improve your ability to capture crisp and clear images through your spotting telescope.
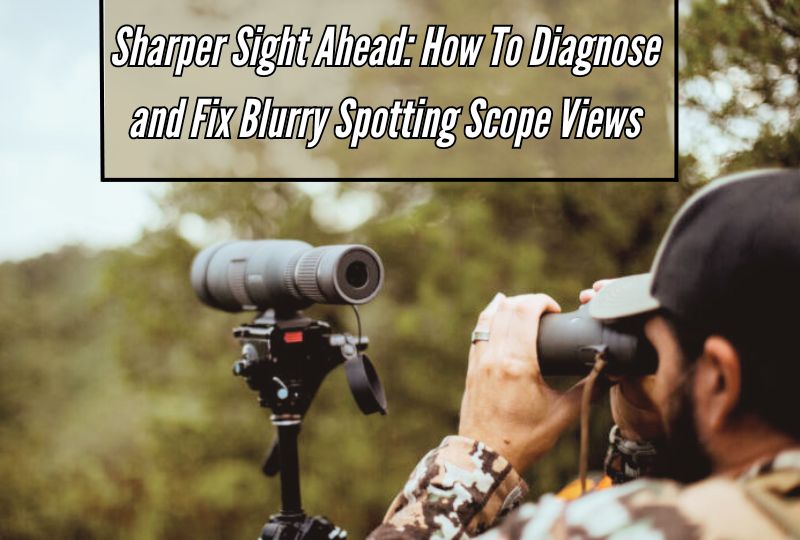
Sharper Sight Ahead: How to Diagnose and Fix Blurry Spotting Scope Views
Identifying Lens Issues:
Blurry spotting scope views can often be traced back to problems with the lenses. It’s essential to inspect the lenses for any signs of dust, smudges, or scratches that could impair clarity.
Even minor debris can have a noticeable impact on image quality, so thorough examination and cleaning are crucial.
Addressing Focusing Challenges:
Achieving sharp focus is paramount for clear views through your spotting scope. Sometimes, blurry images are the result of improper focusing techniques.
Take the time to familiarize yourself with your scope’s focusing mechanism and practice adjusting it until you can consistently achieve crisp images.
Mitigating Atmospheric Distortions:
Atmospheric conditions can introduce distortions that cause blurriness in spotting scope views, particularly when observing distant objects.
Understanding how factors like heat waves, humidity, and air turbulence affect image clarity can help you anticipate and minimize their impact on your observations.
Exploring Optical Upgrades:
Upgrading to a spotting scope with advanced optical features can be a worthwhile investment for improving image quality.
Look for scopes equipped with technologies like ED (extra-low dispersion) glass, which helps reduce chromatic aberrations and produce sharper, more vibrant images, even in challenging conditions.
Cleaning Your Optics:
One of the simplest solutions to blurry views is cleaning your spotting scope’s lenses. Dust, fingerprints, or smudges can degrade image quality.
Using a soft brush or compressed air, gently remove any loose particles before applying a lens cleaning solution and a microfiber cloth for a thorough clean. Exercise caution to avoid scratching the delicate lens coatings.
Utilizing Support Accessories:
In addition to addressing issues directly related to the spotting scope itself, utilizing support accessories can also enhance image clarity.
Tripods, for example, provide stability and reduce vibrations, resulting in steadier views with less blurriness. Similarly, using lens hoods can help minimize glare and improve contrast, further enhancing image quality.
Fine-Tuning Viewing Techniques:
Ultimately, achieving consistently sharp views through your spotting scope requires a combination of technical knowledge and practical experience.
Experiment with different viewing techniques, such as adjusting the eyepiece position or altering your viewing angle, to find what works best for you in various situations. Refining your skills over time will lead to more rewarding viewing experiences in the field.
Mastering Focus: Overcoming Blurriness in Your Spotting Scope
Achieving sharpness in your spotting scope experience requires attention to detail and understanding of key techniques. One essential aspect is understanding the interplay between the focus knob and your target. By delicately maneuvering the focus knob, you can bring clarity to your view, sharpening distant objects and enhancing your overall viewing experience.
Understanding Your Spotting Scope:
Before diving into focus techniques, it’s crucial to understand your spotting scope. Familiarize yourself with its different parts, including the objective lens, eyepiece, and focus knobs.
Understanding how these components work together will help you troubleshoot focus issues more effectively.
Utilizing Support Systems:
Support systems such as tripods and stabilizing mounts are invaluable tools for mastering focus in your spotting scope. These systems provide stability and minimize vibrations, allowing you to maintain steady control over your view and enhance sharpness.
By incorporating support systems into your setup, you can overcome the inherent instability of handheld viewing and achieve optimal focus.
Optimizing Eyepiece Selection:
The eyepiece you choose can have a significant impact on the clarity and sharpness of your spotting scope view. Different eyepiece designs offer varying magnifications, field of view, and optical qualities.
By selecting the appropriate eyepiece for your specific needs and preferences, you can maximize focus and clarity, ensuring a rewarding viewing experience.
Practicing Patience and Persistence:
Mastering focus is a skill that requires patience and persistence. It may take time to develop a keen eye for fine adjustments and to familiarize yourself with the intricacies of your spotting scope.
By approaching each viewing session with patience and a willingness to learn, you can gradually hone your focus abilities and overcome blurriness with confidence.
Maintaining Your Spotting Scope:
Regular maintenance is crucial for optimal performance. Keep your spotting scope clean and free from dust and debris, especially on the lenses.
Store it in a protective case when not in use to prevent damage. A well-maintained scope will provide clearer images and a more enjoyable viewing experience.
Sharp Shooting: Tips to Ensure Your Spotting Scope Stays Clear and Focused
Spotting scopes are indispensable tools for sharp shooting, enabling shooters to spot targets with precision and accuracy.
However, to maintain their effectiveness, it’s essential to ensure that your spotting scope stays clear and focused. Here are some practical tips to achieve this:
Understanding Your Environment:
Before setting up your spotting scope, assess the environmental conditions. Factors like weather, humidity, and dust can affect the clarity of your scope. Choose a stable and clean surface to place your scope, away from direct sunlight and strong winds.
Proper Cleaning and Maintenance:
Regularly clean your spotting telescope to prevent dust, dirt, and debris from accumulating on the lenses. Use a soft brush or compressed air to remove any particles, and gently wipe the lenses with a microfiber cloth. Avoid using harsh chemicals or abrasive materials that could damage the lens coatings.
Invest in Quality Lens Covers:
Invest in high-quality lens covers to protect your spotting scope from scratches, moisture, and debris when not in use. Lens covers are available in various materials and designs, so choose ones that fit your scope snugly and are easy to remove and replace.
Adjusting Focus and Diopter Settings:
Take the time to adjust the focus and diopter settings of your spotting scope according to your eyesight and the distance to your target. Start by focusing on a distant object and then fine-tune the focus until the image is crisp and clear. Similarly, adjust the diopter settings to match your vision for optimal clarity.
Use Anti-Fogging Solutions:
In humid or cold conditions, fogging can be a common issue with spotting scopes. To prevent fogging, consider using anti-fogging solutions or inserts designed specifically for optical devices. Apply these solutions according to the manufacturer’s instructions for best results.
Store Your Scope Properly:
When not in use, store your spotting scope in a protective case or sleeve to shield it from dust, moisture, and accidental damage.
Store it in a cool, dry place away from direct sunlight and extreme temperatures. Proper storage not only prolongs the life of your scope but also ensures that it’s ready for action when you need it.
Regular Inspection and Servicing:
Periodically inspect your spotting scope for any signs of wear or damage, such as loose screws, cracked lenses, or alignment issues.
If you notice any issues, contact the manufacturer or a qualified technician for servicing and repairs. Regular maintenance ensures that your spotting telescope remains in optimal condition for sharp shooting.
Blurred Lines No More: Solutions for Spotting Scope Clarity Issues
Spotting scopes are essential tools for outdoor enthusiasts, birdwatchers, hunters, and photographers. However, despite their usefulness, users often encounter clarity issues that blur the lines between crisp visuals and frustrating blurs.
Understanding the root causes of these problems and implementing effective solutions can significantly enhance the spotting scope experience.
Identifying Common Clarity Issues:
Before delving into solutions, it’s crucial to identify the common clarity issues faced by spotting telescope users. These may include chromatic aberration, poor light transmission, improper focusing, atmospheric distortions, and lens quality deficiencies. Recognizing these issues lays the groundwork for targeted solutions.
Choosing the Right Spotting Scope:
Selecting an appropriate spotting scope is the first step towards ensuring clarity. Consider factors such as magnification power, objective lens diameter, lens coatings, and overall build quality. Investing in a high-quality spotting scope tailored to your specific needs can alleviate many clarity-related challenges.
Calibrating Optimal Focus:
Proper focusing is paramount for achieving clarity through a spotting scope. Take the time to calibrate focus settings based on the distance to the subject, environmental conditions, and personal preferences. Utilize features like fine adjustment knobs or focus rings to achieve precise focus, eliminating blurry images.
Mitigating Chromatic Aberration:
Chromatic aberration, characterized by color fringing around high-contrast objects, can detract from image clarity. Opt for spotting scopes equipped with apochromatic (APO) or extra-low dispersion (ED) glass elements, specifically designed to minimize chromatic aberration. Additionally, avoid using excessive magnification levels, as they can exacerbate this issue.
Utilizing Image Stabilization Technology:
Incorporating image stabilization technology into spotting scopes can effectively counteract hand tremors and vibrations, resulting in clearer images. Look for spotting scopes equipped with gyroscopic or optical stabilization systems, particularly beneficial for long-range observation or photography in windy conditions.
Maximizing Light Transmission:
Enhancing light transmission is crucial for improving clarity, especially in low-light conditions. Opt for spotting scopes with multi-coated or fully multi-coated lenses, which minimize light reflections and maximize brightness. Additionally, consider using larger objective lenses to gather more light, resulting in sharper and clearer images.
Conclusion
In conclusion, there are a number of reasons why your spotting scope may appear fuzzy, including poor focus, dirty lenses, and environmental factors like humidity or heat waves. To resolve this, consider using a microfiber cloth to clean your lenses, changing the focus knob, or holding off till the weather improves.
Purchasing a better scope with superior optics might occasionally also increase clarity. To enjoy crisp and clear views of your surroundings, always remember to handle your spotting scope with care and perform regular maintenance.
Frequently Asked Questions (Why Is My Spotting Scope Blurry)
Why does my scope look blurry?
There are a number of causes for blurriness in rifle scopes. Poor focus adjustment is one common cause. Sharp images can be obtained using the focus ring or eyepiece that can be adjusted on rifle scopes. The image will appear hazy if this adjustment isn’t adjusted properly for your eyes. The scope’s quality itself may also be an issue.
Poor image clarity can result from manufacturing flaws or poor-quality optics. A hazy image can also be caused by environmental factors including humidity, temperature changes, or dust on the lens. These problems can be reduced and the clarity of the image in your scope can be improved with routine maintenance and cleaning.
Can atmospheric conditions affect spotting scope clarity?
Yes, the clarity of a spotting scope can be affected by air conditions. Image distortion, blurriness, or decreased sharpness can be caused by variables such as temperature changes, humidity, and air turbulence. Your vision is impacted by atmospheric turbulence, a phenomenon caused by the diverse ways that air travels at different elevations.
Furthermore, haziness may result from high humidity levels, and thermal currents caused by temperature fluctuations may impede clarity even more. For the greatest viewing conditions, use clear days with steady atmospheric conditions to maximize the performance of your spotting telescope.
Is the quality of the eyepiece important for sharp images?
Yes, having a high-quality eyepiece is essential to getting clear pictures. Your observations will be more detailed and clear overall with a decent eyepiece. With precise optics that lessen distortion and enhance image sharpness, high-quality eyepieces are made. If you are looking at astronomical objects or terrestrial scenery, an improved eyepiece can make a big difference in how much you enjoy your viewing.
Ensuring you view the finer details with clarity is like to enhancing your window to the cosmos. With a telescope or binoculars, selecting a high-quality eyepiece is essential to getting clear, detailed views.
Why do objects appear clear in the center but blurry at the edges?
A condition known as “peripheral blur” causes objects to appear distinct in the middle but hazy around the edges. Because the center of our field of vision contains the greatest number of light-sensitive cells, or cones, this is where our eyes primarily focus. The sharpness decreases as we approach the edges because there are fewer cones there.
Our eyes’ lenses are also tailored for central vision. The inner details are more readable due to this natural design, whereas the edges are less focused. This is a common occurrence that improves our focus on the object in front of us and helps us identify crucial features in the center of our visual field.
How does magnification affect image clarity?
There are two ways that magnification might affect the sharpness of an image. First off, by highlighting flaws in the optics or the image itself, excessive magnification can cause a loss of clarity. Conversely, too little amplification could lead to a loss of detail. It’s comparable to enlarging a picture too much, which causes blur, or too little, which eliminates features.
Achieving the ideal balance is essential for crisp photos. A properly adjusted amplification brings out details while not drawing attention to errors. It’s similar to adjusting a camera lens to take a sharp, well-defined picture—it’s about getting a clear vision without compromising quality.
Can using the wrong tripod lead to blurriness?
Yes, using the incorrect tripod might make your pictures appear blurry. For stability, to avoid camera wobble, and to ensure crisp shots, a strong tripod of the right size is necessary. Especially in low light or with slower shutter speeds, your tripod may not be able to give the necessary support if it is too light or not strong enough for your camera.
This could result in blurry photographs. Selecting and configuring a tripod to the proper height can help you retain stability and lessen the chance of blurry photos. The tripod should weigh the same as your camera and lens.